Integrated Kanban Board
Step 1: Access Kanban Board
- Go to the left-side menu → Service Tickets → Kanban Board → All Kanban

Step 2: Add a New Kanban Board
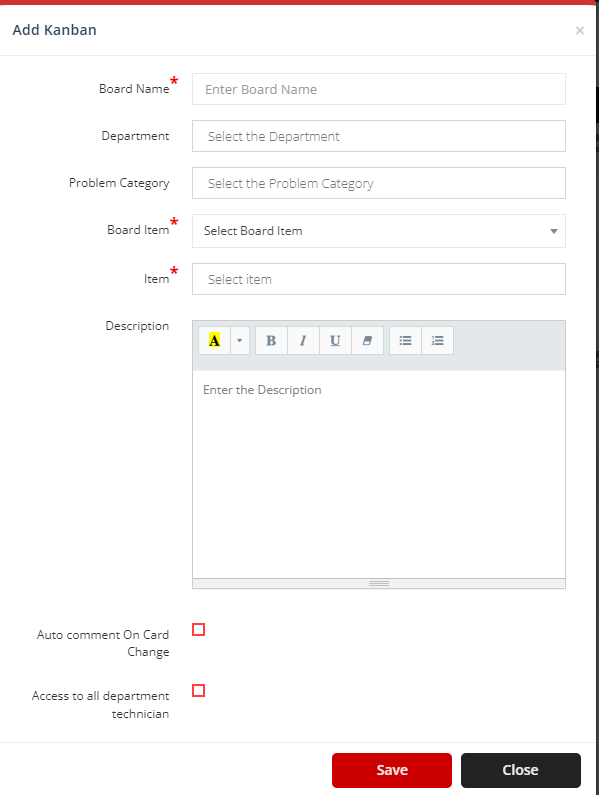
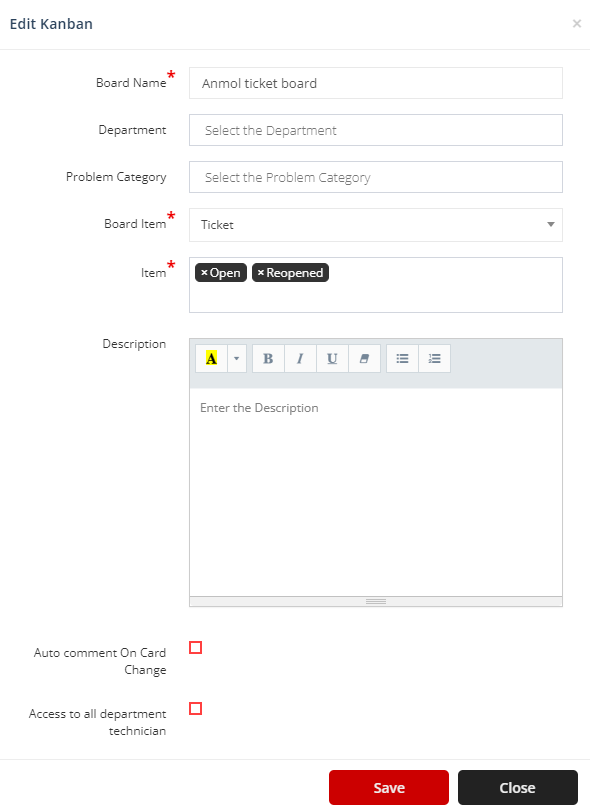
Fill in the following fields:
- Board Name: Enter the name of the board.
- Department: Select the relevant department.
- Problem Category: Choose the appropriate category.
- Sub-Category: Choose the relevant sub-category.
- Board Item: Choose between:
- Ticket: Displays ticket statuses in the dropdown.
- Custom: Allows you to manually define task columns (e.g., Month-wise, Date-wise, etc.)
Additional Options:
- Description: Provide a short description of the board.
- Auto Comment on Card Change:
- If checked, when a card moves from one column to another, the card's status is automatically updated and a comment is added.
- If unchecked, a modal opens allowing the user to enter a comment before the status is updated.
- Access to All Department Technicians:
- If checked, all users from the selected department(s) will have access to this board.
Step 3: Manage Board Members
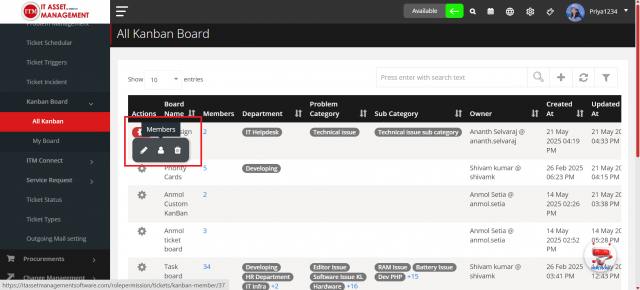
- Click on the Member icon to open the member management page.
Step 4: Set Member Access Rights
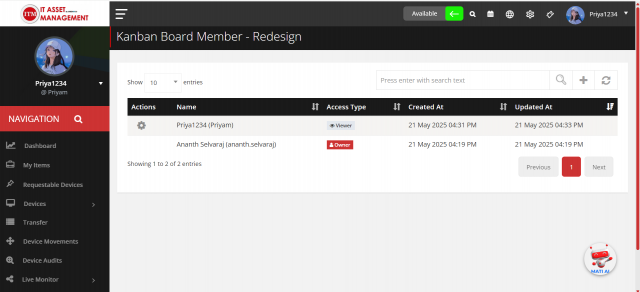
You can assign different access types to each member:
- Owner: Full access to add, edit, delete tasks, and comment.
- Editor: Can add and edit tasks, and add comments.
- Viewer: Can only view tasks and add comments.
Step 5: Add Tasks to Custom Board
- Select the desired Board Name to view items (for Custom Boards).
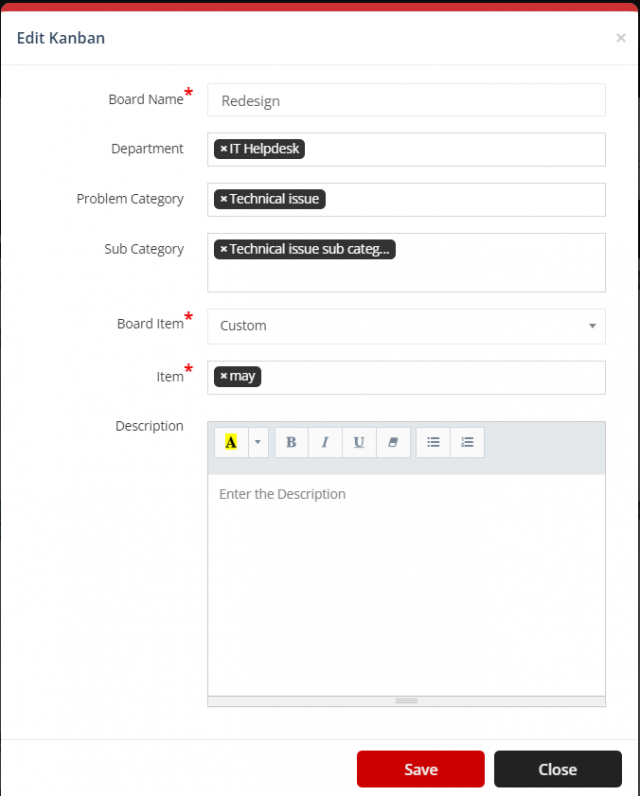
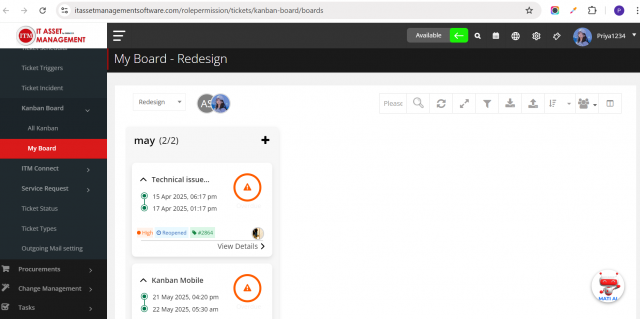
- Click the plus icon (+) on any column (e.g., "May") to add a new task.

You will see two options:
- Ticket – Create a task by linking an existing ticket.
- Custom Task – Create a task manually by entering the following:
- Title
- Description
- Status
- Priority
- Expected Date
- Reference Ticket (if any)
- Assign To (select the responsible person)
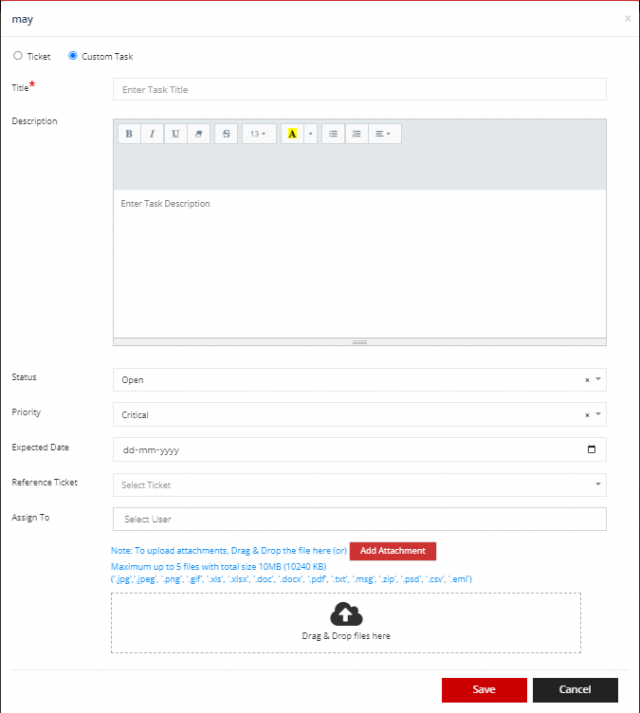
After saving, the task will be added to the board and can be manually managed.
Step 6: Ticket Status-wise Task Management
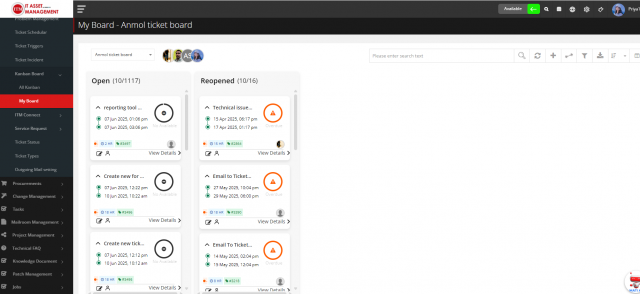
If you select "Ticket" as the Board Item, the board will track and display tasks based on the ticket statuses.
This allows you to visually manage tickets according to their current status, such as:
- Open
- In Progress
- Resolved
- Closed
Step 7: Custom Board – Group By Functionality
The Custom Board provides multiple grouping options to help users organize and analyze their tasks more effectively. You can group tasks by:
- Status – View tasks based on their current progress (e.g., Open, In Progress, Completed).
- Priority – Organize tasks according to their priority level (e.g., High, Medium, Low).
- Assigned To – Group tasks by the team member responsible for them.
- Week – Arrange tasks based on the week they are scheduled for.
- Month – View tasks grouped by their month of assignment or due date.
- Year – Analyze tasks at a yearly level for better long-term planning.
This grouping functionality ensures that users can easily identify and track tasks according to their preferred view.
Step 8: Custom Board – Import Functionality
The Custom Board supports bulk task import to save time and improve efficiency.
- Click on the Import icon.
- Download the provided Excel template.
- Fill in the required task details in the template, including the Sprint Name to which the tasks should be assigned.
- Upload the completed Excel file.
- The system will automatically create tasks under the specified sprint.
Step 9: Task Drag and Drop Functionality
-
Custom Board
- You can drag and drop task cards within the board.
- When a task card is moved to another column, its column assignment is automatically updated.
-
Ticket Board
- You can drag and drop ticket cards only for tickets that are assigned to you.
- If the ticket is not assigned to you, drag and drop will not be allowed.
- Moving a ticket card to a different column automatically updates its status.
Step 10: Custom Board – Clone Functionality
The Clone feature allows you to quickly duplicate an existing custom board (sprint) for reusability. This helps when you want to create a new sprint with the same structure or tasks without setting up everything from scratch.
How to Use the Clone Feature
- Navigate to My Board.
- Select your created custom board.
- Next to the sprint name, you will see a clone icon.
- Click on the clone icon.
- A prompt will appear with three options:
Clone Options
1. Close
- Action: Cancels the cloning process.
- Result: No new sprint is created.
2. Clone Only Name
- Action: Creates a new sprint with the same sprint name (as a duplicate).
- Result: Only the sprint name is cloned.
- Tasks inside the sprint are not copied.
- Use Case: When you want to reuse the sprint name and structure but plan to add new tasks manually.
3. Clone With Task
- Action: Creates a new sprint with the same sprint name.
- Result: All tasks from the original sprint are also cloned into the new sprint.
- Use Case: When you want to duplicate the sprint along with all its tasks for reuse or iteration.
Example Scenario
- You have a sprint named "Sprint 1 – UI Enhancements".
- You click on the clone icon and choose:
- Close → Nothing happens.
- Clone Only Name → A new sprint named "Sprint 1 – UI Enhancements (Copy)" is created, but it contains no tasks.
- Clone With Task → A new sprint named "Sprint 1 – UI Enhancements (Copy)" is created with all the tasks from the original sprint included.
✅ This functionality ensures flexibility in managing sprints—whether you just need the sprint name or the entire set of tasks duplicated.
Step 10: Custom Board – Sprint Rearrangement Functionality
The Sprint Rearrangement feature allows you to change the order of your sprints according to your preference.
How to Use Sprint Rearrangement
- Create sprint names, for example: Jan, March, May, Feb, April.
- By default, sprints may not appear in the correct sequence (e.g., Jan, March, May, Feb, April).
- Using drag and drop, you can rearrange them into the desired order (e.g., Jan, Feb, March, April, May).
- Once rearranged, the new order will be reflected across your board.
✅ This functionality ensures your sprints are always organized in a logical flow that matches your project timeline.
Step 11: Custom Board – Sprint Hide & Show Functionality
The Hide & Show feature allows you to customize which sprints are visible on your board.
How to Use Hide & Show
- Go to your Custom Board view.
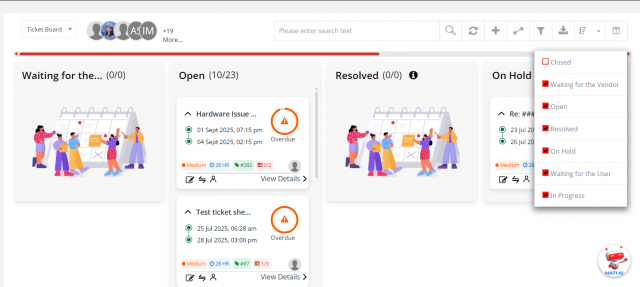
- On the top-right side (last icon in the sprint section), click the Hide/Show Sprint icon.
- A list of all sprint names will be displayed.
- Uncheck the sprint names you don’t want to display → These sprints will be hidden from the board view.
- To show them again, simply check the sprint names → The hidden sprints will reappear.
✅ This functionality helps reduce clutter and keeps your board focused only on the sprints you want to track.
Step 11: Custom Board – Custom Field Functionality
The Custom Field functionality allows you to extend and personalize your Kanban boards by adding additional fields that match your project’s needs.
How to Use Custom Field Functionality
- Navigate to the Custom Field Module.
- Create a Custom Fieldset containing the fields you want to use in your Kanban board.
- Example fields: Priority, Estimated Hours, Department, Tags, etc.
- When creating a new Kanban Board, you will have the option to select a fieldset.
- Once you select the fieldset, all fields from that fieldset will automatically load into the Kanban board.
- These fields can then be viewed and used for managing tasks within that board.


✅ This functionality ensures flexibility by allowing you to tailor each Kanban board with the exact fields your team requires.